Warframe is a third person, free-to-play online cooperative action game set that features an evolving sci-fi game environment. The game has earned a wider fan base because of its fast-paced nature and features unique sci-fi settings you hardly have seen before. To play the game, you have to update its latest edition. However, the update often fails giving you an error notification of “Warframe Update failed“. This issue is prevalent on both standalone game clients and Steam.
So, I have compiled a list of top 20 tried and tested methods to fix the Warframe Error. These methods are applicable on both the above mentioned scenarios.
Before heading to the solutions, let’s find out the exact causes that trigger this Warframe Update Error.
Follow me…
Why Warframe Update Keeps On Failing? Common Reasons
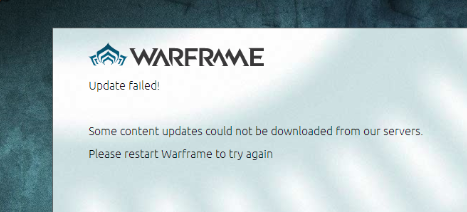
There are different reasons behind the occurrence of Warframe update failure. Here I have mentioned only the ones that most commonly appear to the Warframe users.
Note: Sometimes the things causing the error are no way related to the Warframe game. But, not to worry. These issues can be easily sorted by following the below methods.
Here is the common list of errors:
- Warframe game launcher settings
- Faulty Microsoft Visual C++ Redistributable installations
- A missing or broken DirectX installation
- Third-party programs running on your PC
- Internet connection settings
- Game’s cache data full
Restarting your Warframe will restart the update shortly.
Now, we will check out the solutions to resolve the Warframe error.
Top 20 Methods To Fix Warframe Error
Method 1: Restore the Microsoft Visual C++ Redistributables
Hit the Start menu and search for the Control Panel, then click to open it. Next, hit the Gear icon to open the Settings (if the operating system of your PC is Windows 10).
At the top right corner of the Control Panel, go to Category and then to View as option. Now go to the Programs section located at the bottom on the Control Panel window and hit the “Uninstall a Program”.
Now go to Settings (of your Windows 10 PC) and click on Apps to get the list of all the installed apps on your computer. From there, find the Microsoft Visual C++ Redistributable Package in the Control Panel or Settings and hit Modify after tapping it once. There might be several utility versions. Make note of them and repeat the restoration for each of them.
There may appear some dialog boxes which you have to confirm and follow the steps that appear along with the wizard. Choose Repair for each version of Visual C++ Package. Then hit Finish when the wizard completes the process and repeat the same for the remaining versions as well.
Now check if you can update the Warframe on your PC. If the update fails, move to the next method and do this until you find the most workable one from the below list of other 19 solutions.
Method 2: Reset LAN Settings
Access Internet Explorer and hit the Gear icon present at the top right corner of the screen. Click on Internet options from the menu to open the list of relevant connection settings. Open Control Panel if you are unable to access Internet Explorer. Then type “control.exe” in the command dialog. Next, tap OK to run the command.
In the Control Panel, go to the top right corner, then to Category and select “View as”. Then tap on the Network and Internet option to open it. Tap on Internet options to move to the same window as you would while opening Internet Explorer.
Now move to the Connections tab and open the LAN Settings. Check the option beside Automatically Detect Settings and ensure the Proxy servers are empty unless you use one actively, which is generally not recommended unless you want additional connection settings while playing Warframe.
Now Apply the changes you made and restart your PC. Then check if the Warframe update error still appears.
Method 3: Tweak Some Launcher Settings
Access Warframe’s launcher from Desktop or Start menu option or by double-clicking on Warfraje’s shortcut file. If you already downloaded and installed Warframe on Steam, then open it and go to the Library tab, and double-click on the game’s entry to launch it.
Next, as the Warframe launcher opens, find the cog icon located at the top right corner, and then the ‘x’ followed by the minimize button. Then tap on it to go to the launcher settings.
Now a new window will open, there, disable the Bulk Download option and hit OK. Then try to update the game and see if it fails.
Method 4: Reinstall DirectX
Enter the DirectX End-User Runtime Web Installer Download Page on Microsoft’s official website. Then scroll down the page to locate, and tap on the red Download option.
Next, follow the on-screen instructions to directly download the DirectX Web Installer on your PC. After downloading, complete its installation process by opening the downloaded .exe file in the Downloads folder and following the DirectX installation wizard instructions.
Finally, move to the Terms & Conditions page and hit Next.
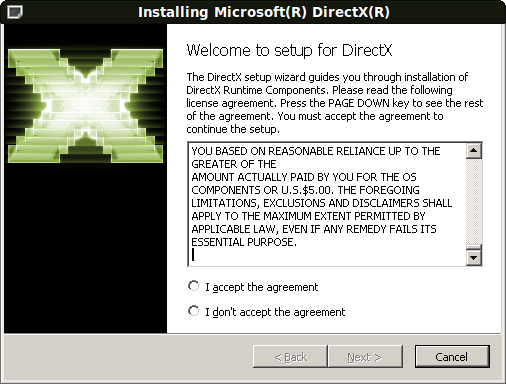
Then restart your PC and try updating Warframe and check if an update error appears.
Method 5: Connection Failure Due to Network Errors
Type “Command Prompt” on Windows search bar or Start menu. Then right-click the first entry that pops up on the search result and select the context menu entry saying “Run as administrator”.
Now type “cmd” in the Run dialog and use the (Ctrl + Shift + Enter) key combination to run the command using admin privileges.
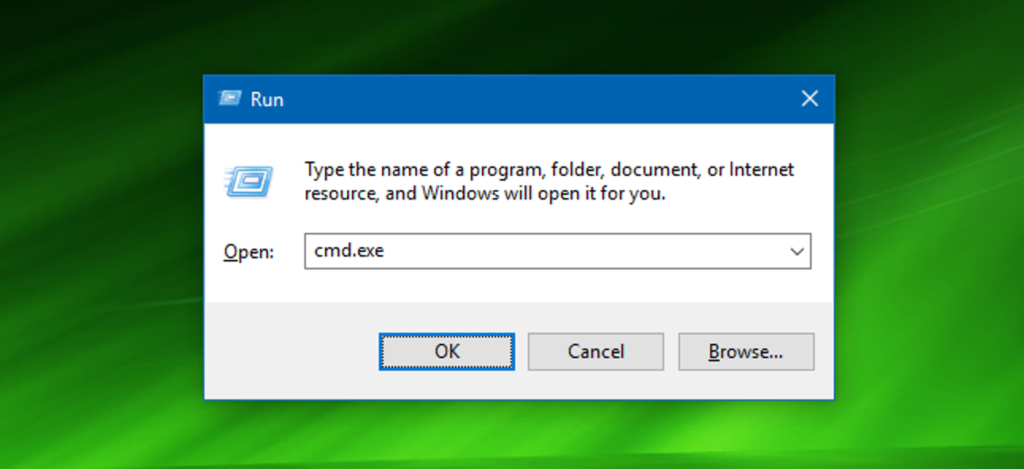
Type the below italicized commands and hit Enter after each command entry.
ipconfig/flushdns
ipconfig/release
ipconfig/release6
ipconfig/renew
Now wait until you receive the “Operation completed successfully” message or something similar to confirm that this solution has worked out and that you didn’t make any mistake while typing.
Finally, reopen Warframe by double-clicking its shortcut file or launch it via Steam. Then check if the Warframe update fails.
Method 6: Run Warframe Launcher as an Admin
Double-click on the Steam icon and open it. Now locate the Library tab at the top of the Steam window and head to the Library section.
Next, find Warframe from your gaming list in your library. Open it by right-clicking, then select Properties. Go to the Local Files tab and select Browse Local Files.

If your Warframe is of standalone client version, then also you can manually find the game’s installation folder. Just right-click on Warframe’s shortcut (on PC home-screen or wherever you saved it). Then select Open file location from menu.
Once you are in the installation folder, find and access the Tools folder. There, you have to locate the Launcher or launcher.exe file. Right-click on the file and select Properties. Then go to the Compatibility tab and check the option next to “Run this program as an administrator”.
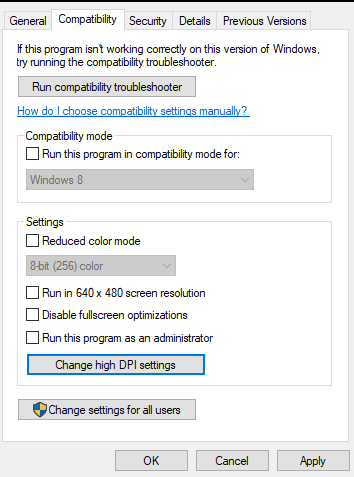
Finally, click on Apply for the changes you made. Then try relaunching Warframe and see if the update error still persists.
Method 7: Switch Languages from Game’s Launcher
Double-click on Warframe’s shortcut file to open the game’s launcher. If your game is downloaded through Steam, then open it and go to the Library tab. Next, open the game by double-clicking the Warframe entry.
As its launcher opens, find language text next to ‘x’, minimize, and settings button located at the top right corner. Modify it and wait until the game launcher reloads. Repeat this process for some more languages till it finally works!

Method 8: Clear Game’s Cache
Open Steam by double-clicking on its icon. Then locate the Library tab at the top in the Steam window and navigate to the Library section. Now search and locate Warframe from your gaming list in your library.
Next, right-click on the Warframe entry and select Properties. Then go to the Local Files tab and select Browse Local Files.
If your Warframe is of standalone client version, then too, you manually locate the installation folder of Warframe. Simply right-click on the game’s shortcut file, navigate to menu and select Open file location.
As you get inside the game’s installation folder, locate Cache. Now right click on the Windows folder and select the Rename option. Then rename the folder to Cache.Windows.old or something similar and hit Enter.
Finally, reopen the Warframe launcher and see if error occurs while updating the game or the game starts just right. Restore changes made to the folder name, if the update fails.
Method 9: Scan Your PC for Malware
Malwarebytes Anti-Malware is an amazing malware scanning tool that comes with an unpaid trial version, downloadable from the Internet.

Hopefully, the free version will be enough to resolve the “Warframe update failed” error unless you have other issues as well to take care of.
Find the file you just downloaded and open it by double-clicking on it. Choose where on your PC you want to install the Malwarebytes file and follow the on-screen instructions to finish the installation procedure.
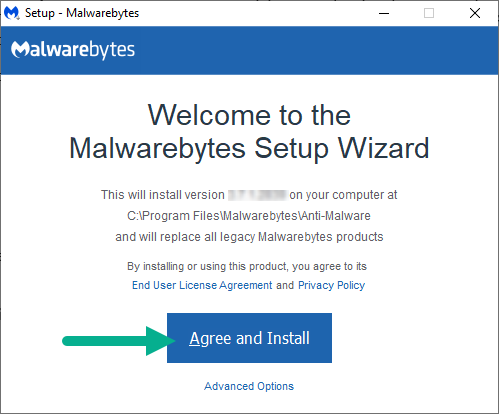
After that, open Malwarebytes and choose Scan located at the home-screen of that tool. The application will possibly launch its update service to update its malware database. Then it will begin the scan. Now you have to wait patiently until the scan is complete as it may take some while. If it detects a virus on your PC, make sure to delete it.
Finally, restart the PC after the scanning is over. Then check if the “Warframe update failed” issue is settled or not.
Method 10: Reconfigure Launcher Settings
Click to open the Warframe launcher menu. Then choose the cog located at the top right corner of the menu. Again, choose the “
“Launcher Settings” from the list. Enter it and uncheck “Enable 64-bit Mode”.
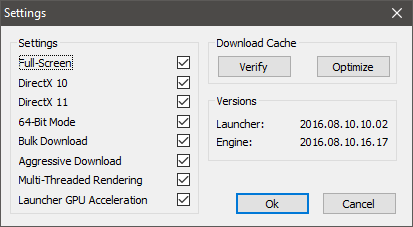
Then save the changes made. Finally, try to update Warframe and check if the update error is settled.
Method 11: Allow the game through Firewall
Launch the Run Prompt by pressing “Windows” + “R” key combination on the keyboard. Type “Control Panel” in the Run dialog and hit “Enter” for launching the Classical Control Panel Interface.

Next, tap on the “View By” button located at the top and hit the “Large Icons” option. After that, click on “Windows Defender Firewall” and again on “Advanced Settings” from the left side.
Firstly, tap on the “Inbound Rules” button from the left side. After that, click on “New Rule” located on the right side of the window.
Next, choose “Program” from the Rule Type window and hit “Next”. (It includes SQLbrowser.exe file). Click browse below “This Program Path” to choose the program executable file, then hit “Next”.
Now, check the “Allow the Connection” box and click “Next”.
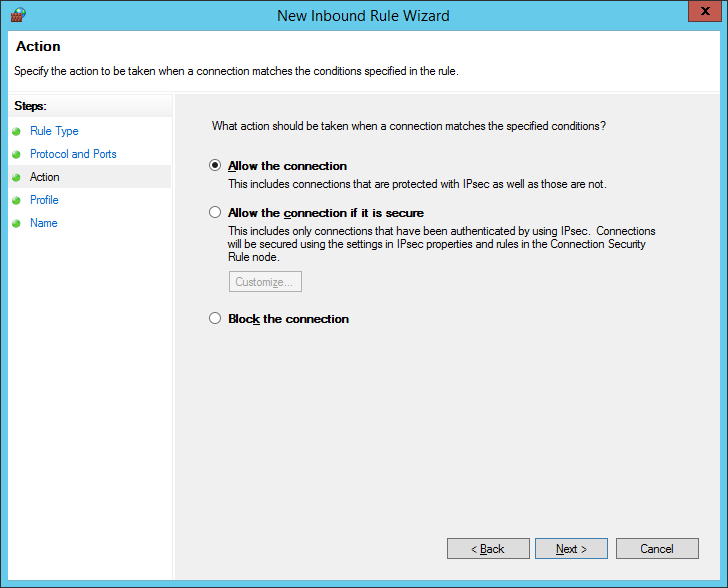
Then choose when to apply the (Domain, Private, Public) rule under this window and allow it for all connections, also hit “Next”.
Select the rule name and if you want, enter a description for the same. Then hit “Finish” to add an Inbound rule to allow the Warframe requests coming to the PC.
You will have to create an Outbound rule to allow Warframe fully through the Firewall. This will allow the game to fully latch with its servers.
Similarly, in the fifth step, select the “Outbound Rules” to create an outbound rule.
Now check if the “Warframe update failed” error is sorted or not.
Method 12: Update Windows
Open Settings by pressing “Windows” + “I” keys on the keyboard. Then hit the “Update & Security” option from the Settings menu and choose “Windows Update” located on the sidebar.
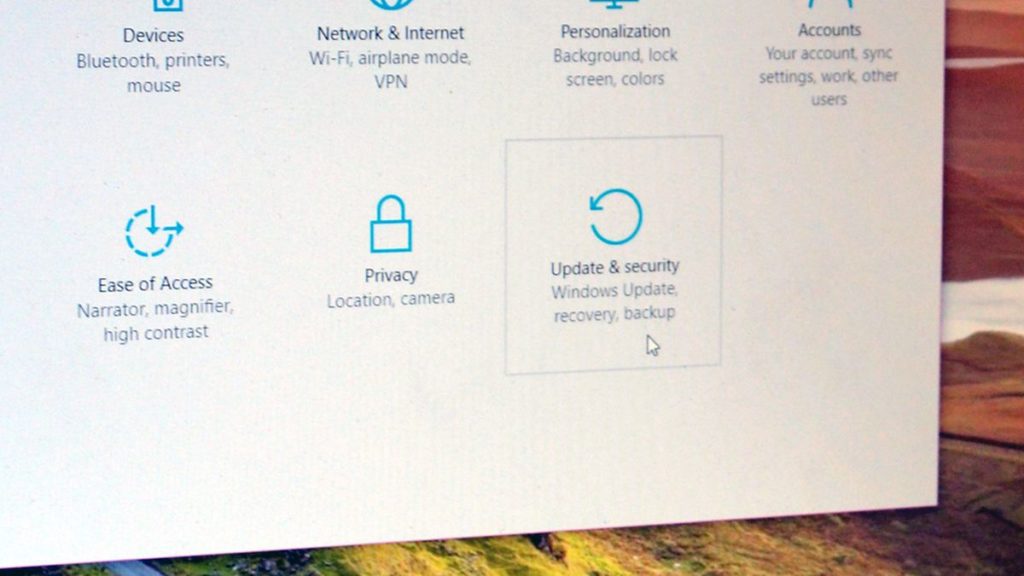
Next, tap on the “Check for Updates” option to execute an auto-update check on your PC.

Now your PC will automatically check for any available Windows updates and install the same. After updating, try updating Warframe to see if it fails or completes successfully.
Method 13: Disable Avast
Locate the Avast icon from the Windows taskbar. Right-click on that icon and choose the “Avast Shields Control” option. Then select one from the below options:
- Disable for 10 minutes
- Disable for 1 hour
- Disable until computer is restarted
- Disable permanently

Confirm your selected option by hitting “Yes” when Avast asks you. The Avast antivirus alongside all the other shields will now be paused for your selected period of time.
To check if the antivirus is properly disabled, go to its main window, if it is showing red and says “All antivirus shields are off”, that means your procedure worked successfully. Now try updating your Warframe game.
To enable the antivirus, hit the “Resolve” button and wait for some while until you get the message saying “You’re protected”.
Method 14: Disable VPN
Sometimes using a proxy or VPN on your PC to mass your internet connection and hide your internet usage could be the reason for your Warframe update failure. That is why, what I suggest is to disable all the VPN connections of your computer temporarily if you have already set up one. Also, make sure that your location of web browsing is not masked anyway.
Most servers get alerted when the internet connection is bounced off of several servers before finally being able to reach and access those resources. Then these servers perceive the net connection to be a suspicious one, considering it a threat and so blocks it from accessing the server resources. So, it is best to disable the VPN connection and try updating Warframe to check if the error issue expires.
Method 15: Reset the Internet Connection
First of all, unplug the modem and router from the main power supply (Make sure to remove all the other devices’ batteries as well).
Then wait for 30 seconds before you again plug-in the connections to the modem and then the router.
Wait until the entire setup is back to power again. As the hardware setup gets back to full functionality, now check if the Warframe update issue is gone or not.
Method 16: Try Using a VPN
If you are using the main ISP (International Service Provider) keeping your browsing location unprotected, then set up a VPN connection at the earliest on your PC. Sometimes the Warframe update error pops up due to regional problems. So, using a reputed VPN connection will help you mask your current location.
VPN gives your browser access to such websites which are either permanently or temporarily banned in your region. So, I would suggest you purchase a VPN connection and then try updating your Warframe game.
Method 17: Check Your PC’s Connection with Warframe Website
The update error may appear when you can not access Warframe.com through the Internet Explorer. So, be very sure of your PC’s connection with the Warframe website.
Just paste this link: https://warframe.com in the internet explorer. There are certain Windows components used by the Warframe launcher which are also used by the Internet Explorer. So, in case you are unable to access the above link in Internet Explorer, it is probably because your connection to that website is blocked.
To resolve this connection issue, send a ticket to Warframe Support.
Method 18: Reconfigure Internet Explorer
Press “Windows” + R” on the keyboard and enter “inetcpl.cpl”. Then hit “OK” to launch the Internet Explorer window.
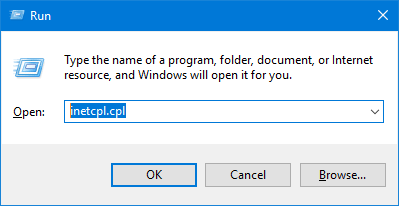
Next, tap on the “Connections” tab and make sure to select the “Never Dial a Connection” option. Also, tap on the “Advanced” tab, then go to the “Browsing” options to uncheck “Enable Offline items to be synchronized on a Schedule”.
Once done making the changes, save them and exit the window. Now check if this trick has resolved the Warframe update error or not.
Method 19: Remove Temporary Internet Files
Press “Windows”+ “R” key combination on the keyboard and type “Inetcpl.cpl”. Then hit “OK” to launch the Internet Explorer window.
Now, go to the “General” tab and tap on “Delete”. After that, uncheck all the boxes except “Temporary Internet files” and hit “Delete”.

Finally, try updating Warframe and see if the failing issue still persists.
Method 20: Set the Current Date and Time
Locate the Date and Time icon from the lower right corner of your computer home-screen. Right-Click on that icon and further click on the “Adjust Date/Time” option.
Toggle off that option, then navigate to “Set Date and Time Manually” and choose the “Change” option.
Reconfigure date and time as per the current date and time of your location. Finally, check if the Warframe error issue is fixed or not.
Conclusion
That’s all, Readers! I hope the above list of methods turn out to be useful in settling the “Warframe Update Failed” error. But, I would personally suggest you to follow method 1. If there is no other issue with your Windows 10 PC other than Warframe update, then this solution will surely work.
FAQs
1. Why won’t my Warframe update?
The Warframe installer will require the administrator permission for updating the files on your PC. Begin the installation by confirming that both Warframe and Steam are initially completely closed. Then begin the Warframe installation as an Administrator. If you are using Steam, start as an Administrator and run Warframe normally via Steam.
These are some of the common reasons why your Warframe update fails:
- Warframe game launcher settings
- Faulty Microsoft Visual C++ Redistributable installations
- A missing or broken DirectX installation
- Third-party programs running on your PC
- Internet connection settings
- Game’s cache data full
2. How to update the Warframe game?
You can update the Warframe game manually. The game installer will require administrator permission to update Warframe files on your PC.
Just follow the below instructions in order:
- Go to Start menu and find your Warframe’s shortcut file (or Steam)
- Open the shortcut by right-clicking and then tap on Properties
- Choose Compatibility tab
- Tap on Change settings for all users
- Select Run this program as administrator under Privilege Level
- Save the changes by clicking Apply
3. How do I update my Warframe launcher?
Go to Warframe’s official website. When you are in the Warframe launcher window, click on the download arrow located at the top right corner of the screen and choose any language you prefer. That’s it. If there is any available update on the launcher screen, it will get automatically downloaded. Then you can begin with your game.
4. Why is my Warframe download so slow?
How fast or slow your Warframe download speed is depends on the server traffic. Sometimes the server gets overloaded when multiple players are trying to download the Warframe update at a time.
Here is what I suggest to speed up your Warframe download:
The trick is to click on Settings and hit “Optimize” after your Warframe download speed has gone slow. The real issue with the download speed is related to the number of players Warframe has and a server will try to hook up the newer connections to feed their download. The optimized setting grabs server’s attention to some extent, if you will.


